WordPress is a versatile content management system (CMS) that allows the Hostinger platform to host and build websites.
As WordPress is free software to use, you can easily install it in Hostinger through various methods: hPanel, Auto Installer, and Softaculous to run multiple websites efficiently.
In this article, we’ll learn how to install WordPress in Hostinger using several methods and what to consider before installing it.
Requirements Before Installing WordPress In Hostinger
There are a few requirements to consider before you begin installing WordPress in Hostinger. Check the necessities below and ensure you have the following:
1. Hostinger Hosting Plan: Ensure you’ve purchased a hosting plan supporting WordPress. Hostinger offers several plans, including Shared Hosting, WordPress Hosting, and VPS Hosting. If you don’t have an active plan, you can purchase one using our Hostinger coupon code.
2. Domain Name: Register your unique domain name. Hostinger allows you to purchase a domain or use an existing one. You can also purchase a domain using a Hostinger domain coupon.
3. SSL Certificate: Hostinger provides a free SSL certificate with most of its hosting plans, which ensures that your website is safe and secure.
4. PHP and MySQL: Hostinger hosting plans support the latest versions of PHP and MySQL, which are mandatory to run WordPress.
How To Install WordPress In Hostinger?
Hostinger offers several methods for installing WordPress. Let’s discuss the three most common ways:
1. Installing WordPress Using Hostinger hPanel
The common way to install WordPress is hPanel. Follow the steps below to install WordPress using Hostinger hPanel.
Step 1: First, log into your Hostinger account.
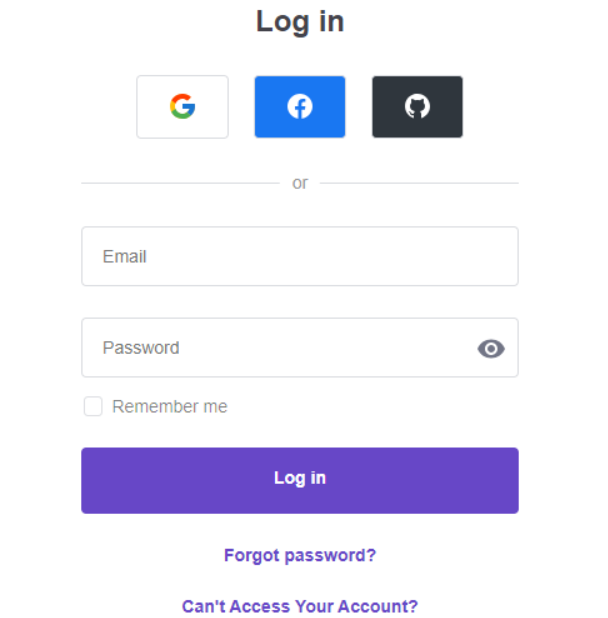
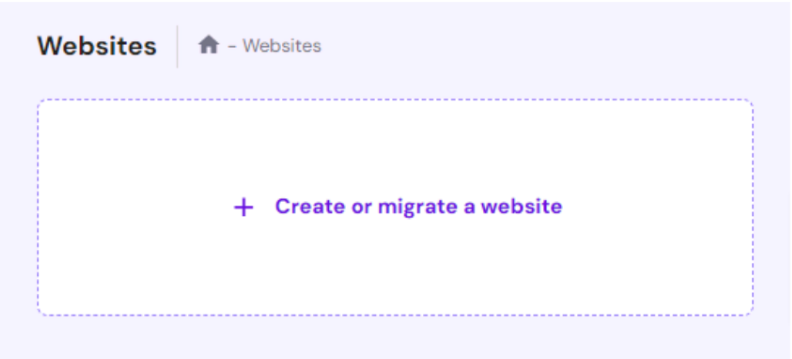
Step 2: Then log into hPanel and select ‘Create or migrate a website.’
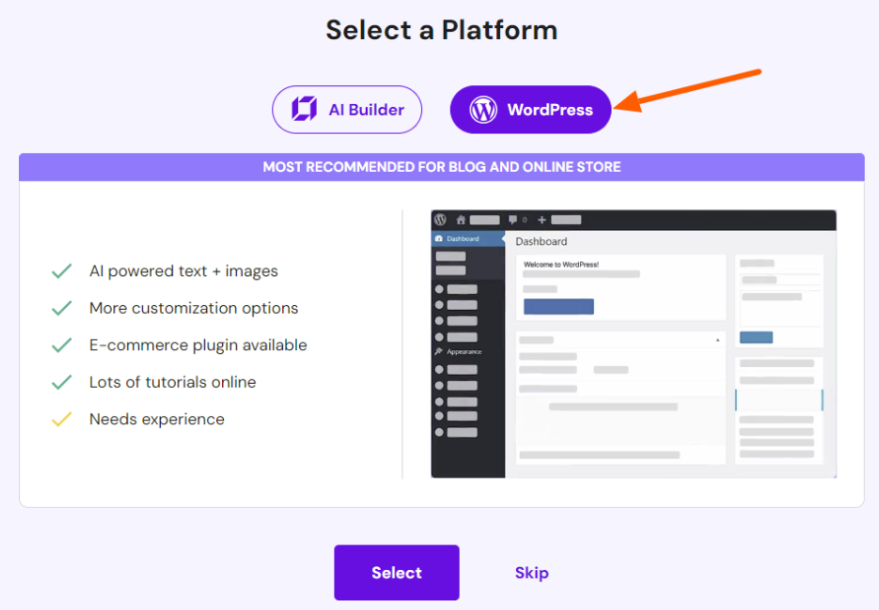
Step 3: Select the type of website you want, choose Create a new website, and click ‘WordPress’ as your platform.
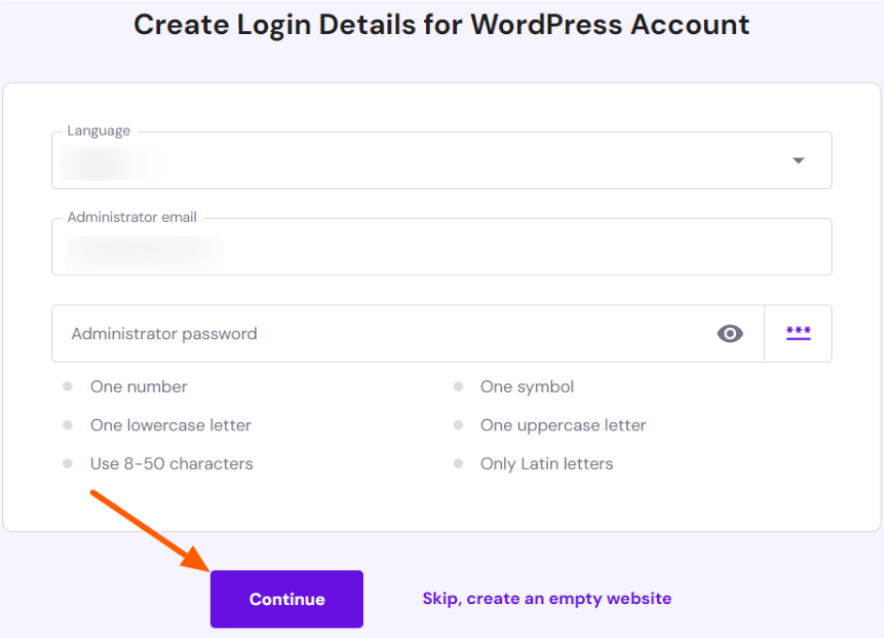
Step 4: Create your login details for your WordPress account, including your preferred language, valid email address, and strong password. After adding these details, click ‘Continue.’
Step 5: After following the prompts, register a domain name or select an existing one from the dropdown field to start the Installation process.
Step 6: Click ‘Install,’ and Hostinger will automatically set up WordPress on your domain. Select ‘Admin Panel’ to access your WordPress dashboard.
2. Installing WordPress Using Auto Installer
Hostinger’s Auto Installer is a user-friendly tool that allows you to install WordPress with a few clicks. It is even best to install older versions of WordPress. Here are the steps to install WordPress using Auto Installer;
Step 1: On the Hostinger official website, go to the hPanel and click ‘Auto Installer’ in the website section.
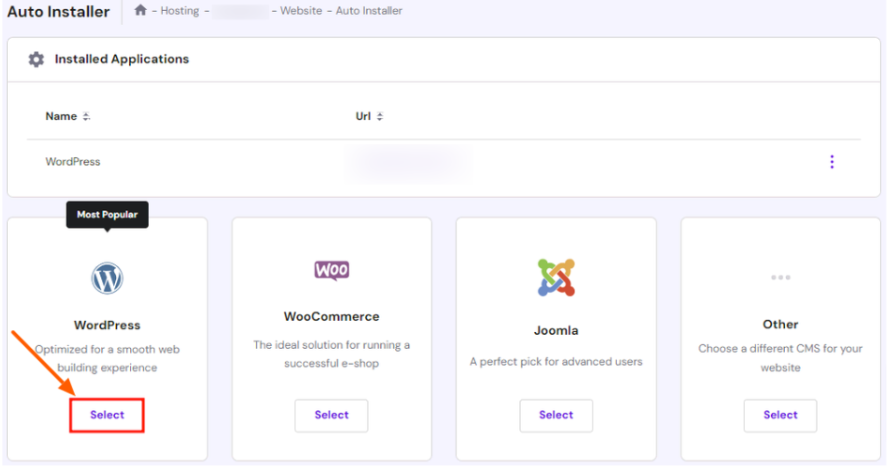
Step 2: Enter the necessary information, such as your website title, email address, and password, and click ‘Next’.
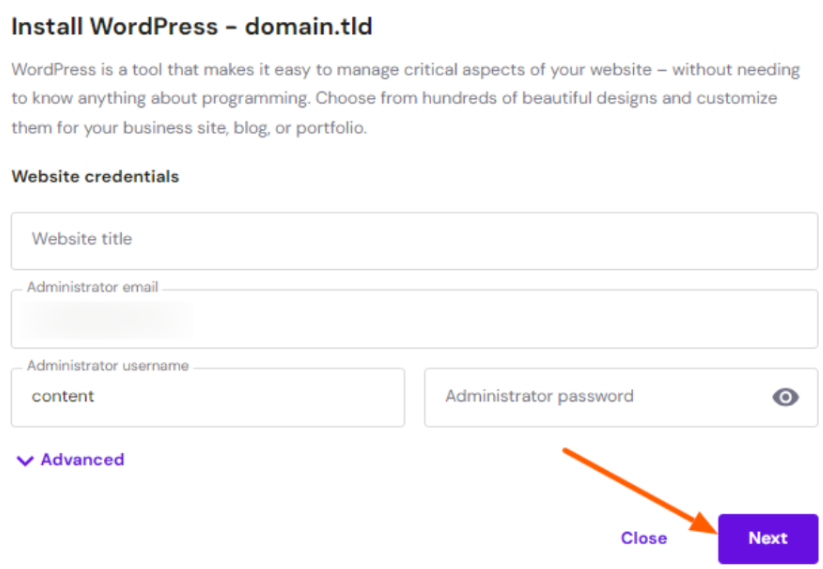
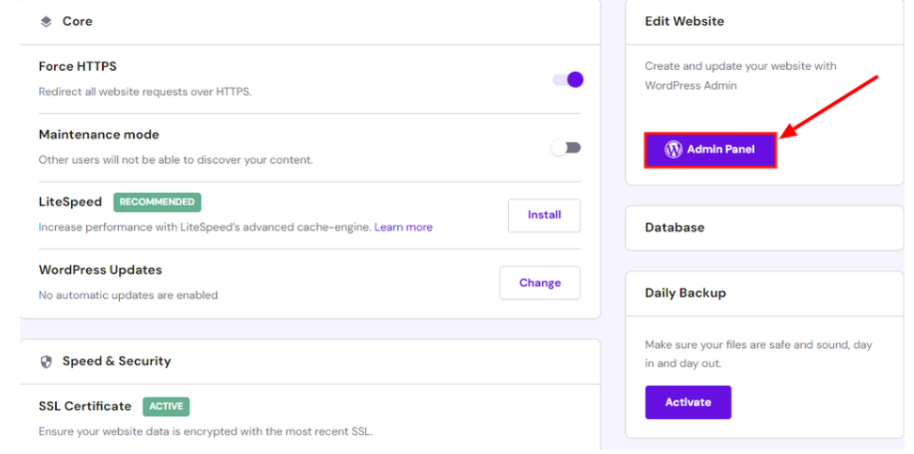
Step 3: Once you install WordPress, you can configure it through the ‘Manage’ option by clicking on the three dots next to the WordPress URL.
Step 4: Click the ‘Admin Panel’ option for WordPress admin access.
3. Installing WordPress Using Softaculous
WordPress can be installed by non-Hostinger users using Softaculous. As this integrates with the cPanel, let’s learn how to install WordPress from cPanel.
Step 1: In hPanel, go to the ‘Manage’ section and Log in to your cPanel.
Step 2: Navigate to ‘Softaculous Apps Installer’ from your cPanel account and select the ‘Install’ WordPress button.
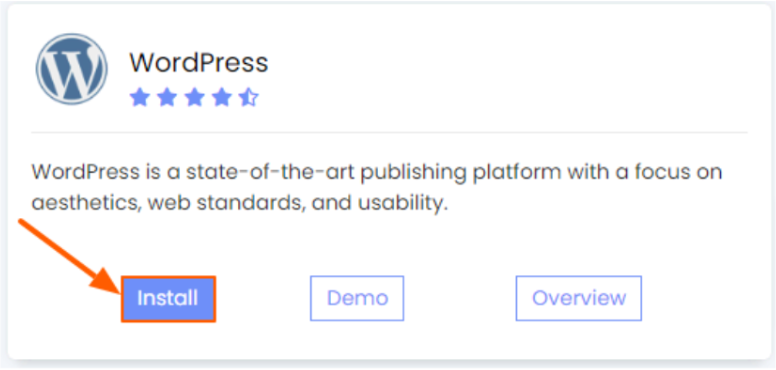
Step 3: Select the WordPress you want to install if you choose the encryption protocol.
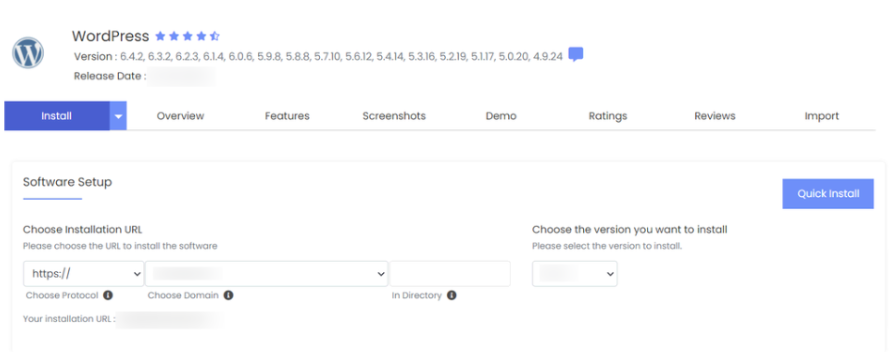
Step 4: Provide your site’s details, including domain, admin credentials, and email ID.
Step 5: After filling out the details according to your requirements, click ‘Install,’ and Softaculous will set up WordPress on your Hostinger account.
How To Install WordPress Manually?
In quite an extreme case, if all the above three methods fail, you can install WordPress manually. Let’s begin with the steps to install WordPress Manually;
Step 1: Visit the official ‘WordPress website and download the latest version of WordPress.
Step 2: Go to the ‘File Manager’ from hPanel, and upload the ZIP file. Right-click the file and ‘Extract’. You can use an FTP account to upload the WordPress files.
Step 3: In hPanel, navigate to “Databases” and create a new MySQL database. In the file, enter the database name, username, and password.
Step 4: Select ‘Run the installation’ after completing the verification process.
If you want to run your website and manage operations smoothly, Hostinger offers various options for installing WordPress efficiently.
You can manually edit technical aspects if you have purchased managed WordPress hosting. Hostinger is currently offering up to 82% discount on WordPress hosting.
Conclusion: Install WordPress In Hostinger Via 3 Different Methods!
Hostinger offers multiple ways to install WordPress, each catering to different user preferences. There are three methods to install WordPress via hPanel, Auto Installer, and Softaculous. Additionally, users can install WordPress manually if all these tools don’t work.
Whether you use hPanel’s built-in tools, the Auto Installer, Softaculous, or even install WordPress manually, Hostinger ensures the process is user-friendly and efficient. Choose the method that best suits your needs and requirements.
